The DragonBoard 410c is a development board with Qualcomm® SnapdragonTM 410 (64-bit quad-core processor). It is fully functional and powerful, with built-in 8GB eMMC (supports standard microSD card slot) and built-in wifi. Bluetooth, and GPS module with HDMI output and USB interface (3). All of this is integrated into a board that is only credit-sized and priced at just $75. All of this makes the DragonBoard 410c an ideal choice for embedded computing and Internet of Things (IoT) products such as next-generation robots, cameras, medical devices, vending machines, smart buildings, digital signage, casino gaming consoles and more.
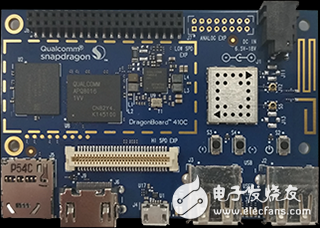
The DragonBoard 410c is compatible with the 96Boards Consumer Edition (CE) specification, which is maintained by the Linaro Community Council and targets the mobile, embedded and digital home industries.
The DragonBoard 410c is currently available for Android 5.1, Ubuntu, and Windows 10 IoT Core systems, and is one of the first devices to be certified by Microsoft. It is certified to support the Azure IoT SDK and is ready for IoT applications.
How to burn Android and Ubuntu systemsThere are two ways to write, one is to write the system through the SD card, and the other is to burn through the fastboot.
Write by SD card 1. Download SD card image and extractDownload the Ubuntu SD card image from here
Download the Android SD card image from here
2. Write image to SD cardView the SD device by the following command:
Sudo fdisk -l
Then execute the dd command to write the image to the SD card:
Sudo dd if=db410c_sd_install_YYY.img of=/dev/XXX bs=4M
Finally, be sure to execute the following command to ensure that the data is written:
Sudo sync
3. Adjust the development board S6 switch to the 0-1- 1-0 positionThe S6 switch is switched to the state shown below. The white switch is 1 (on) and the bottom is 0 (off).
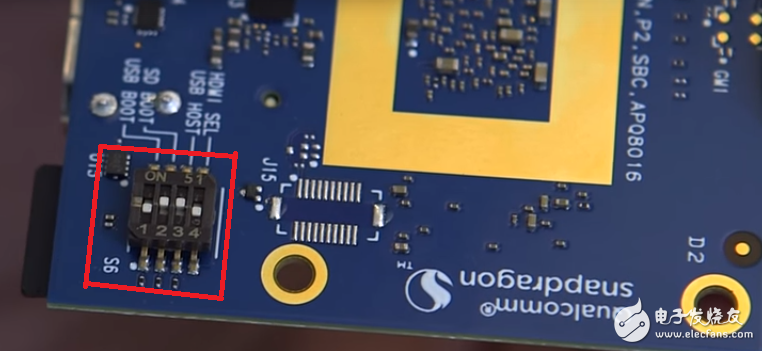
Connect the display device via HDMI, connect the mouse and keyboard, and power on.
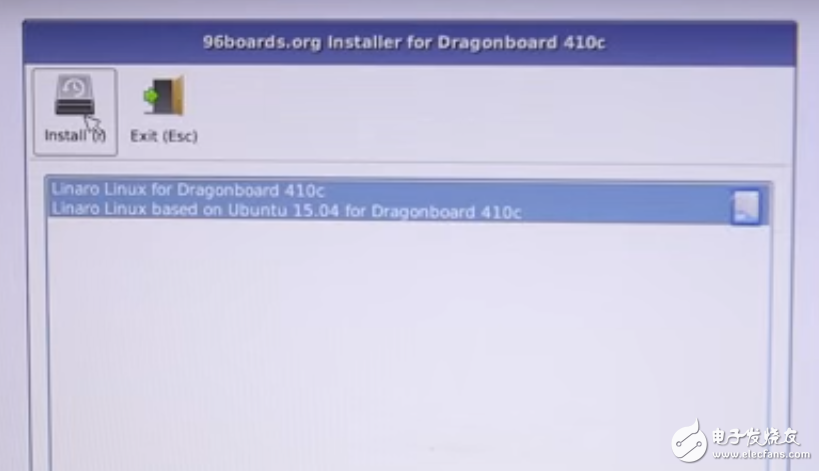
5. Install the system into the development board eMMCAfter power-on, the following installation interface will appear. Click Install. After a few minutes, you will be prompted to install the pop-up window. Do not click ok to restart the system.
S6 is set as shown below:
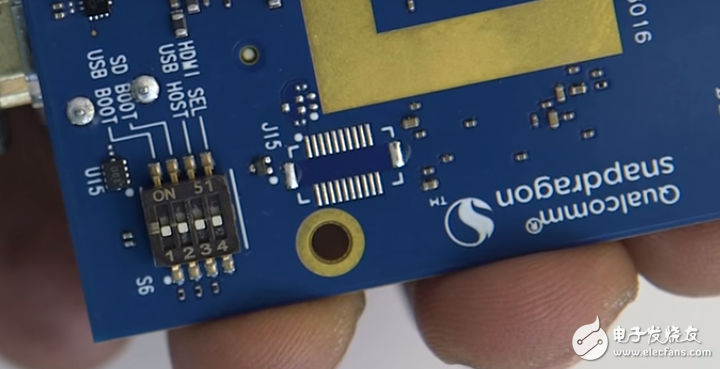
Then click the ok button in the interface dialog to restart the system after burning.

In addition to using the SD card to burn the system, we have a more convenient and quick way, which is to burn the system through fastboot.
Install the Linaro/Ubuntu system
1. Download Ubuntu system bootloaderDownload Ubuntu bootloader image from here
2.DragonBoard 410c boots to fastboot modeFirst you need to make sure that S6 is in the 0-0-0-0 state and then you need to connect to the PC via usb. There are two ways to enter fastboot, one is to enter through the sudo adb reboot bootloader command, and the other is to press and hold the S4 (volume-) button during startup.
3. Burn the bootloaderUnzip the downloaded bootloader, then go to the unzipped directory and execute the following command to burn the bootloader:
Sudo ./flashall
Because the bootloader part includes the partition information, you must restart it after burning the bootloader:
Sudo fastboot reboot bootloader
4. Download the boot image and root image of the Ubuntu system.Download the Ubuntu boot image from here
Download the Ubuntu root image from here
5. Burn the boot and root imagesAfter the downloaded image is decompressed, it is programmed by the fastboot command:
Sudo fastboot flash boot boot-linaro-vivid-qcom-snapdragon-arm64-BUILD#.img
Sudo fastboot flash rootfs linaro-vivid-developer-qcom-snapdragon-arm64-BUILD#.img
6. Restart the systemSudo fastboot reboot
Install Android system 1. Burn bootloader imageAs with the first three steps of Ubuntu, start up to fastboot mode and execute sudo ./flashall.
Download Android bootloader image from here
2. Download the Android imageDownload the boot image from here
Download the system image from here
Download the userdata image from here
Download the recovery image from here
Download the persist image from here
Download the cache image from here
3. Burn Android image
After extracting the downloaded image file, execute the following command to burn:
Sudo fastboot flash boot boot.img
Sudo fastboot flash system system.img
Sudo fastboot flash userdata userdata.img
Sudo fastboot flash recovery recovery.img
Sudo fastboot flash persistence.img
Sudo fastboot flash cache cache.img
4. Restart the systemSudo fastboot reboot
Containerized Energy Storage System Integrator
Our Battery Energy Storage System is a type of energy storage power station that uses a group of batteries to store electrical energy. The KWH energy solutions is used to stabilise grids, as battery storage can transit from standby to full power within milliseconds to deal with grid failures.
Lithium battery storage power station, Energy storage power station,Containerized Battery Energy Storage System,KWH Energy Solutions, Lithium Battery system solutions,On and off grid energy systems,integrated all-in-one energy storage solutions
Shenzhen Enershare Technology Co.,Ltd , https://www.enersharepower.com